
If you’re ready to elevate your baking game, the Sublime Black Velvet Treat is the ultimate project. This dessert isn’t just a cake—it’s a conversation starter, a social media star, and a testament to the magic of chocolate. In this guide, you’ll learn everything from its intriguing origins to pro-level decorating tricks. Let’s get started!
Why the Sublime Black Velvet Treat Captivates Dessert Lovers
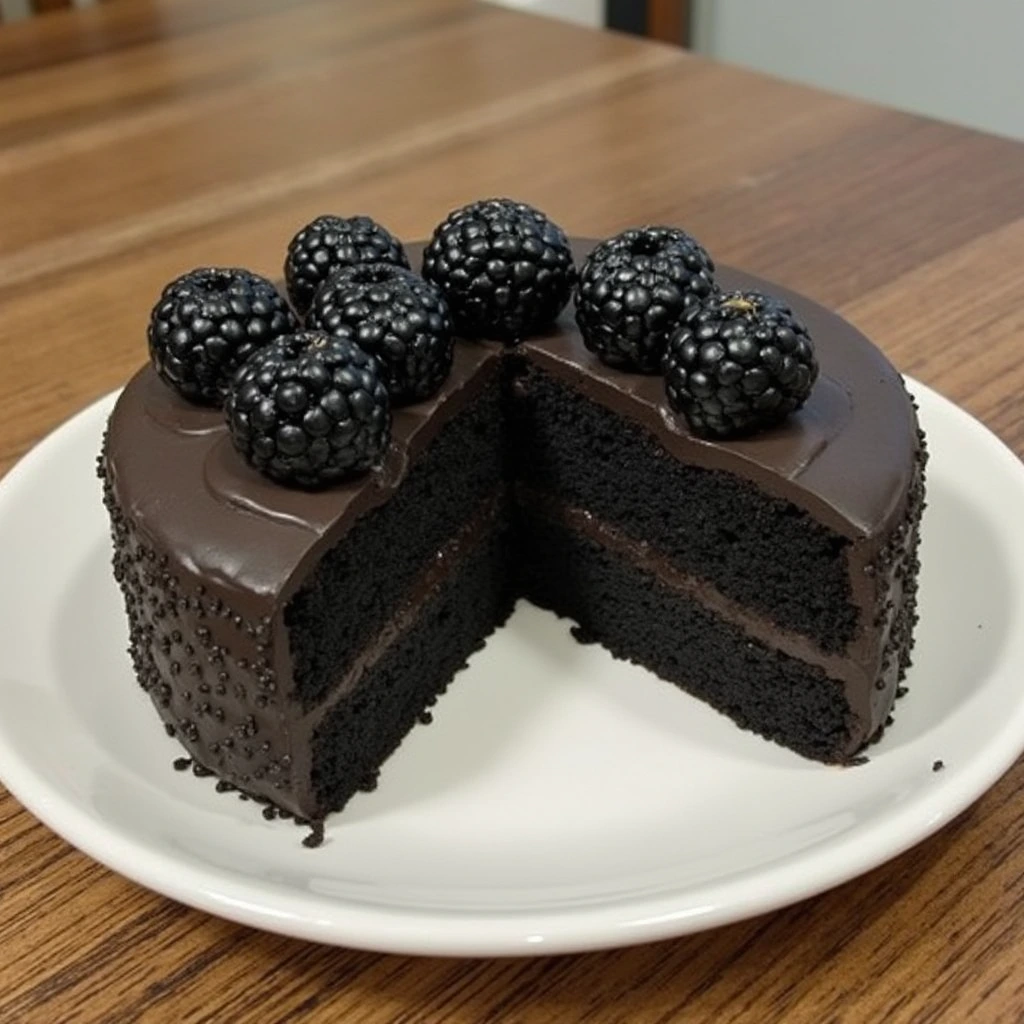
A Feast for the Senses
The Sublime Black Velvet Treat isn’t just about taste—it’s a multisensory experience. The velvety crumb melts in your mouth, while the glossy dark exterior creates a dramatic visual contrast. Add the aroma of rich cocoa, and you’ve got a dessert that engages sight, taste, smell, and touch.
Versatility for Every Occasion
- Weddings: Swap traditional white cake for a bold black velvet tier.
- Halloween: Pair with orange frosting for a spooky-chic dessert.
- Dinner Parties: Serve mini trifles layered with berries and whipped cream.
The Evolution of Velvet Cakes: From Victorian Era to Viral Sensation
A Journey Through Time
- 1800s: Velvet cakes emerged as a luxury item, using almond flour or cornstarch for a fine texture.
- 1930s: Red velvet gained fame at New York’s Waldorf-Astoria Hotel.
- 2000s: The black velvet trend exploded on platforms like Instagram and Pinterest.
The Science Behind the Velvet Texture
The “velvet” texture comes from a chemical reaction between acidic ingredients (buttermilk, vinegar) and baking soda. This creates tiny air bubbles, resulting in a soft, tender crumb.
For a historical deep dive, explore The Smithsonian’s take on American cake culture.
Ingredient Spotlight: Building Blocks of Perfection
1. Cocoa Powder: The Heart of the Recipe
- Dutch-Processed vs. Natural Cocoa:
- Dutch-processed (alkalized) has a smoother, less acidic flavor.
- Natural cocoa works but may require extra baking soda for balance.
- Brand Recommendations: Valrhona or Cacao Barry for professional results.
2. Buttermilk: The Secret to Moisture
- Why It Works: The acidity breaks down gluten, ensuring a tender texture.
- No Buttermilk? Mix 1 cup milk + 1 tbsp lemon juice (let sit 5 minutes).
3. Black Coloring: Achieving the Signature Shade
- Gel Food Coloring: Start with 1 tsp and add until you reach a deep black.
- Activated Charcoal: A natural alternative (use 2 tsp, but avoid if on medication).
Step-by-Step Recipe: Crafting a Flawless Black Velvet Masterpiece
Phase 1: Preparing the Batter (Pro Tips Included)
- Sift Dry Ingredients:
- 2½ cups all-purpose flour
- ¾ cup Dutch-process cocoa
- 1½ cups granulated sugar
- 1 tsp baking soda
- ½ tsp salt
Why sift? It prevents lumps and aerates the mixture for a lighter cake.
- Combine Wet Ingredients:
- 1 cup buttermilk (room temperature)
- 2 large eggs
- ½ cup vegetable oil (or melted coconut oil)
- 1 tbsp vanilla extract
- 1 tbsp black gel food coloring
Pro Tip: Use a whisk to emulsify the oil and buttermilk fully.
- Mix Gently:
- Fold wet ingredients into dry with a spatula until just combined. Overmixing = tough cake.
Phase 2: Baking Like a Pro
- Pan Prep:
- Grease pans with butter + cocoa powder (prevents white flour residue).
- Use parchment paper rounds for easy release.
- Oven Setup:
- Preheat to 350°F (175°C).
- Bake on the middle rack for even heat distribution.
- Doneness Clues:
- Edges pull away from the pan.
- A toothpick has moist crumbs (not wet batter).
Common Mistake Alert: Opening the oven door too early causes sinking!
Phase 3: Frosting and Assembly
Cream Cheese Frosting Recipe
- 16 oz cream cheese (softened)
- 1 cup unsalted butter (room temperature)
- 4 cups powdered sugar (sifted)
- 1 tsp vanilla extract
- Pinch of salt
Instructions:
- Beat cream cheese and butter until fluffy (3–5 minutes).
- Gradually add powdered sugar.
- Mix in vanilla and salt.
Layering Techniques
- Leveling: Use a serrated knife to trim domed tops.
- Filling: Spread ½ cup frosting between layers.
- Crumb Coat: Apply a thin layer, chill 20 minutes, then add the final coat.
For flawless frosting skills, check out King Arthur Baking’s frosting guide.
Beyond the Basics: 7 Creative Variations to Try
1. Black Velvet Oreo Cheesecake
- Method: Layer crushed Oreos, black velvet cake crumbs, and no-bake cheesecake.
2. boozy Black Velvet Tiramisu
- Twist: Soak cake layers in coffee-Kahlúa syrup and layer with mascarpone.
3. Gluten-Free Black Velvet Donuts
- Adaptation: Use gluten-free flour and bake in a donut pan. Dip in dark chocolate glaze.
4. Black Velvet Ice Cream Cake
- Assembly: Alternate layers of cake and chocolate ice cream. Freeze overnight.
5. Vegan Black Velvet Brownies
- Swap: Replace eggs with flax eggs and use coconut oil instead of butter.
6. Black Velvet Cake Pops
- Process: Crumble cake, mix with frosting, roll into balls, and dip in white chocolate.
7. Savory-Sweet Black Velvet Appetizer
- Surprise: Bake mini black velvet muffins with a hint of black pepper. Serve with goat cheese.
Presentation Magic: Turning Dessert into Art
1. Modern Gothic Aesthetic
- Color Contrast: Pair black cake with bright gold leaf or edible flowers.
- Serve on Slate: Use slate boards or black porcelain plates for a moody vibe.
2. Holiday-Themed Designs
- Christmas: Dust with powdered “snow” and add rosemary sprigs.
- Valentine’s Day: Pipe red frosting hearts and garnish with rose petals.
3. Interactive Dessert Stations
- DIY Toppings Bar: Let guests customize slices with sprinkles, sauces, and fresh fruit.
Nutritional Breakdown and Smart Swaps
Calorie Count (Per Slice)
- Classic Recipe: ~450 calories (without frosting).
- Healthier Version: ~300 calories (using applesauce and Greek yogurt frosting).
Dietary Adaptations
- Keto: Use almond flour, erythritol, and sugar-free chocolate.
- Paleo: Substitute coconut flour and date paste.
The Dark Chocolate Advantage
Dark cocoa is packed with iron, magnesium, and antioxidants. Learn more from Harvard’s nutrition research.
Troubleshooting: Fixing Common Baking Disasters
Cake is Too Dense
- Causes: Overmixing, expired baking soda, or cold ingredients.
- Fix: Mix wet and dry ingredients separately, then combine gently.
Frosting is Too Runny
- Causes: Warm kitchen or undermixed butter.
- Fix: Chill the bowl for 10 minutes or add ¼ cup powdered sugar.
Cake Sticks to the Pan
- Causes: Insufficient greasing or cooling time.
- Fix: Line pans with parchment and let cool 15 minutes before removing.
FAQs: Answering Every Possible Question
1. Can I Use Melted Chocolate Instead of Cocoa?
Yes! Replace cocoa with 4 oz melted dark chocolate (adjust sugar accordingly).
2. How Do I Prevent the Cake from Drying Out?
Brush cooled layers with simple syrup (equal parts water and sugar).
3. Can I Make This in a Sheet Pan?
Absolutely! Bake at 325°F (160°C) for 18–22 minutes.
4. What’s the Best Way to Color the Cake Naturally?
Use 2 tsp activated charcoal (available at health stores).
5. Can I Skip the Food Coloring?
Yes, but the cake will be dark brown, not black.
Final Thoughts: Embrace the Dark Side of Baking
The Sublime Black Velvet Treat isn’t just a dessert—it’s a celebration of creativity and craftsmanship. Whether you’re baking for a special event or simply indulging your sweet tooth, this recipe offers endless opportunities to experiment and impress.
Ready to take your skills to the next level? Share your creations with #BlackVelvetBrilliance and inspire others to join the dark (chocolate) side!